Preparing OVH vRack Config for Multiple IPv6 Subnets
OVH vRack IPv6 Configuration Guide (Only needed if you using additional IPv6 Subnets via vRack) This guide explains how to configure IPv6 subnets via OVH vRack with Link Aggregation (LACP) for optimal proxy performance.
Overview
Section titled “Overview”This configuration will:
Create a bonded interface using both network cards Route all traffic through vRack (private network) Provide stable IPv4 and IPv6 connectivity Eliminate dual-interface routing issues
⚠️ Warning: After completion, your server will only be accessible via the new vRack IP addresses.
-
Order vRack
- Log in to the OVH Control Panel
- Navigate to Bare Metal Cloud → Network → vRack private network
- Create a new vRack (if you don’t have one)
- Wait for the vRack to be created (may take a few minutes)
-
Order IPv4 Block. (/30 IPv4) (You can order larger blocks if you want more than 1 usable IPv4 address)
- Navigate to Bare Metal Cloud → Network → IP section and order a new IP block (/30 for IPv4)
- Assign the IP block directly to your vRack.
-
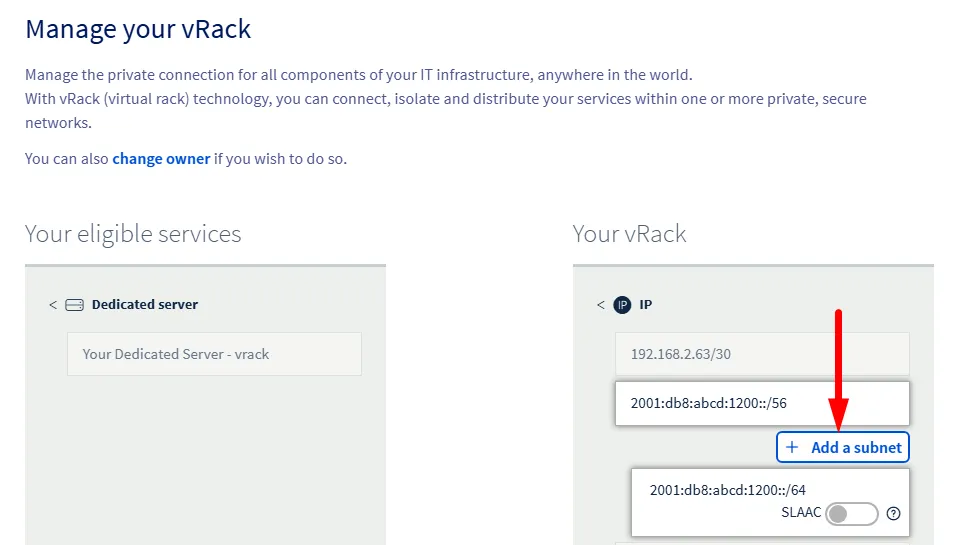
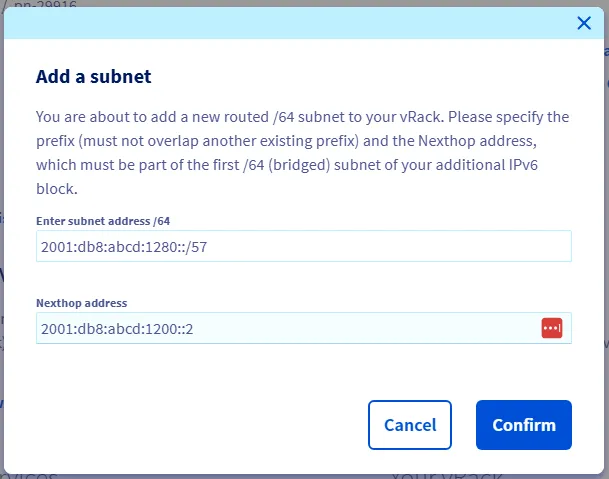
Order IPv6 Block. (/56 IPv6) (You can repeat that step if you want more than one /56 subnet)
- Navigate to Bare Metal Cloud → Network → IP section and order a new IP block (/56 for IPv6)
- Assign the IP block directly to your vRack.
-
Make sure your Dedicated Server is not yet connected to the vRack.
If it is, disconnect it first. Otherwise you can’t activate the Link Aggregation (LACP) on the server.